Different Ways to Hang the Kids Artwork
Skill Level: Beginner
School is in session, which means it's time for a fresh, new way to display the children's artwork.

Craft your own wall gallery using re-purposed picture frames and cork sheeting. Creating custom frame facings to fit over plain or unattractive salvaged or store-bought frames adds a personal touch to your children’s own creations.
Project Completion Time: 1 hour plus drying time for adhesives and paints.
Thing’s You’ll Need

- (1) Piece ½" Plywood, 2' x 2 '
- (1) Piece of Scrap Lumber
- BLACK+DECKER CS3653LC Storage Screwdriver
- Picture Hanging Tool
- BLACK+DECKER KS701EK Jigsaw with CurveControl™
- BLACK+DECKER Stss025 Sander
- Unpainted Wood Picture Frames (one per piece of art)
- (1) Large Sheet of Paper
- Pencil
- Scissors or Craft Knife
- 1/4" Drill Bit
- (2) 2" C-Clamps
- Hammer
- (4) Picture-Hanging Hooks and Hardware (1 per frame)
- 120-Grit Sandpaper
- Wood Glue
- Acrylic Craft Paint
- Foam Brush
- (1) Roll 1/4"-thick Cork Sheeting
- (8-16) Decorative Thumbtacks (2 to 4 per frame)
Step by Step Instructions
Step 1. Create Frame Templates
Select a store-bought frame to use for each custom frame facing. A simple, inexpensive, wood frame with a flat front is best. Remove the glass and backing from the frame. Center the frame atop a large sheet of paper and trace the inner frame opening and the perimeter of the frame onto the paper with a pencil. Draw a playful and random curvy shape around the outside of the frame to make a custom frame facing design. Remove the wood frame, and then cut out the paper frame facing shape with scissors.
Step 2. Prepare the Plywood
Place the paper template on your plywood and trace around the paper. Set the plywood atop a thick scrap board and drill one hole at each inner corner of the frame facing, using the BLACK+DECKER Screwdriver and a 1/4"" drill bit. The holes go inside the part of the facing that will be cut out, giving the saw a place to start each cut.


Step 3. Attach the Shelf
Secure the plywood to a work surface with clamps so about half of it overhangs the edge of the work surface or bench. Cut along the pencil lines, using the BLACK+DECKER Jigsaw, inserting the jigsaw blade into a hole to begin each interior cut. Reposition the plywood, as needed, and cut out the remainder of the facing shape.
Step 4. Assemble the Custom Frame
Lightly sand the cut edges of the facing, using the BLACK+DECKER Sander and 120-grit sandpaper, and wipe off the extra dust. Apply a thin bead of wood glue to the front face of the original wood frame, and then set the plywood facing on top, lining up the interior openings so they are flush with each other. Clamp the pieces together with C-clamps until the glue dries. Repeat the same process to create as many custom frames as you like.


Step 5. Paint the Frames
Place all of the frames on a papered surface. Paint the fronts and sides of the frames using a foam brush and acrylic craft paint in a color of your choice. Let the first coat dry, following the manufacturer's directions. Apply one or two more coats, as needed, letting the paint dry completely after each coat. TIP: Paint all the frames the same color for a cohesive look, or paint them in one of several complementary colors for a more eclectic look.
Step 6. Apply Cork Backing
Using the backing of each frame and a roll of cork sheeting, trace and cut out enough cork sheeting to cover the back of each frame. Glue the cork sheeting to the exposed backing board inside each frame. If desired, you can apply the cork in several layers to create a thicker backing for the tacks.


Step 7. Add Artwork
Display artwork in each frame, using thumbtacks to hold the paper in place. The frames can display either paper art or 3-dimensional pieces that can stand on their own and fit within the frame opening.
Tip: The artwork can be changed at any time by removing the tacks from the cork material.
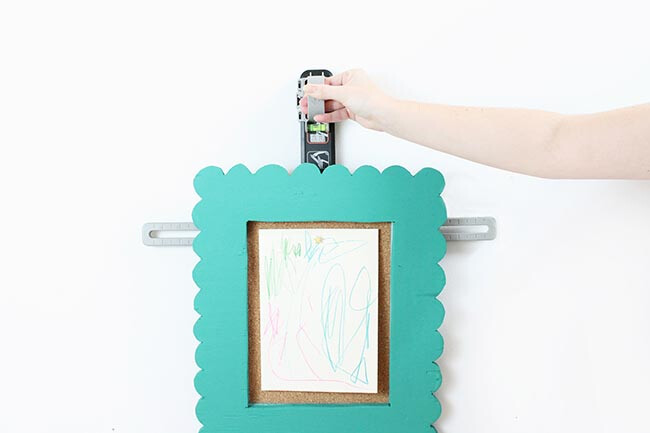
Step 8. Prepare the Gallery Wall
Hang the frames onto your gallery wall using the Picture Hanging Tool. Set the tool to the desired hanger position for each frame. Position the frame onto the tool and hold the tool and frame against the wall in the desired location. Use the bubble level on the tool to position the frame perfectly level, and then gently press the frame toward the wall. The tool will make a mark at the hanger location.
Step 9. Hang the Frames
Remove the frame and tool and install a picture hanger, using a hammer to drive a nail or the Screwdriver for a screw. Hang the frame from the hanger. Repeat with the remaining frames. Position all of the frames in a straight line, or place them at different heights to create multiple levels.
Tip: Use adhesive picture-hanging strips if you don’t want to make holes in the walls. These are ideal for old plaster walls or in rental homes. Apply the strips to the frames and/or walls following the manufacturer’s directions.